Opening Thoughts
The art of knotting, known as macrame, has made a grand resurgence in the realm of interior design. With its elaborate patterns and bohemian allure,
The Essence of Macrame
Originating from the 13th century, macrame is the enthralling method of knotting strings or cords in sequences to form ornamental items. The true charm of macrame lies in its pure simplicity – all that’s required are your hands and some cords.
Necessary Supplies
Before you embark on your
- Cotton cords: These are preferred due to their soft texture and durability.
- A wooden dowel or a branch: This serves as the foundation from which your macrame design will dangle.
- Scissors: Essential for trimming cords to the appropriate lengths.
- Tape measure: To accurately gauge cord lengths.
Fundamental Macrame Knots
Macrame features a variety of knots, each contributing a unique pattern and texture. The three primary knots for beginners to grasp are:
Square Knot
The square knot is frequently seen in macrame wall decorations. It forms a flat, square-shaped pattern that can be modified by adjusting the knot’s tension.
Larks Head Knot
The Larks Head knot is usually the initial knot used in any macrame project. It fastens your cord to the dowel or branch.
Half Hitch Knot
The Half Hitch knots are excellent for introducing curvy or diagonal lines to your design.
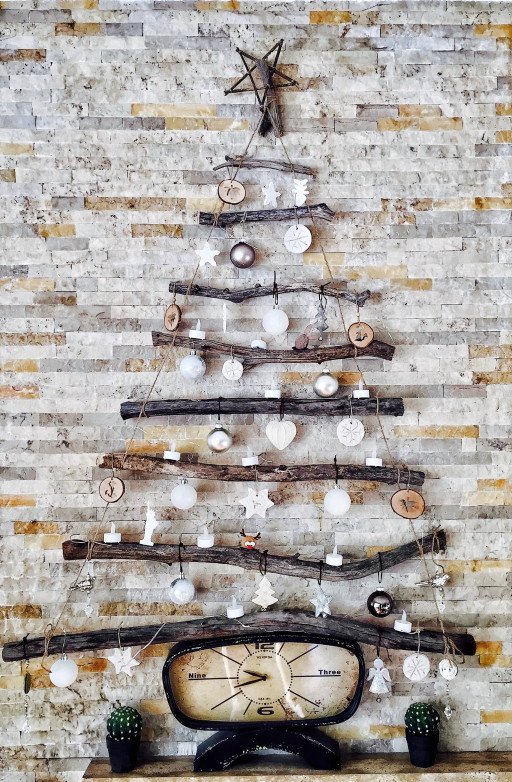
Your handcraft unique homemade coat racks
Now, we’ll outline the steps for creating your stunning
Step 1: Cord Preparation
Trim your cords to the preferred lengths. For novices, approximately 2 meters is a good starting point.
Step 2: Securing the Cords
Secure the cords to your dowel or branch using the Larks Head knot.
Step 3: Beginning with Square Knots
Commence with a row of square knots across all the cords. This establishes the base of your wall decor.
Step 4: Incorporating Additional Rows
Add more rows of square knots. The pattern can be diversified by altering the starting point of each row.
Step 5: Introducing Half Hitch Knots
For design variation, incorporate a row of half hitch knots.
Step 6: Completing Your Wall Decor
Once content with your design, trim any excess cord and secure the ends.
Succeeding in Your DIY Wall Hanging Macrame
Constructing your
- Repetition is beneficial: The more you practice, the more refined your knots become.
- Patience is vital: Macrame is a meticulous craft. Don’t rush the process.
- Innovation is welcomed: Don’t hesitate to experiment with different knot styles and patterns.
Closing Thoughts
The joy derived from crafting a
Related Posts
- 5 Easy Steps to Craft a DIY Banana Hanger Guide
- DIY Plant Hanger Guide: 7 Steps to a Personalized Botanical Showcase
- DIY Plate Hanger Ideas: 5 Steps to Elegant Display Solutions
- DIY Rope Plant Hanger Guide: 7 Steps to a Handcrafted Home Accent
- 7 Incredible Steps to Handcraft Your Unique Homemade Coat Racks